Showing posts with label Creative Juices. Show all posts

Tuesday, July 19, 2011

two boys and a girl

This is what happens when you have 2 baby boys and then a GIRL.

My baby, in a boy camo creeper that I painted a pink birdie on.  I thought surely having a baby girl would be all hair bows, ruffles and twirls, not so much.  I love making things for her and I really love buying her sweet things, but for every day wear it is just not practical!  Iz is as rough and tumble as her brothers ever were, so I find myself going through their old things trying to figure out what I can make work for my girl.  I think this creeper in particular turned out wonderful, a little girly, a little tough, all Iz. 
A special thanks to my dear friend B, who actually gave me this creeper when Iz had a blow out at her house (B has all boys), then told me to keep it.  I had no clue what I could possibly do with this boyish onsie when my baby was a girl!  Then I painted the birdie on it and I LOVE it, now I feel inspired.
How cute is my Iz?


Sunday, June 12, 2011

Upcycled T-shirt


This was at one time an XL mans shirt that I got from Goodwill for $1
Here is what I did to it...
I cut it apart at the armpits so I had a large tube of fabric
I used a tank top I like to make the marks for cutting the appropriate space for my armpits (I never realized how yucky that word is :/)
I then sewed a hem large enough for my ties to feed through at the top of my front and back piece
and I used my seam ripper to make a little hole in the hem already at the bottom of the shirt
I fed elastic, cut 1" shorter that my waist measurement, through the bottom hem and sewed it together
Then I fed the tie (that I made the same way I made the belt here except without the button or closure) through the tunnels in the top front and back pieces (much like a pillowcase dress).
DONE
in one nap time
for $1 and some left over fabric from my Easter Skirt :)


** A little note if I make another one I will use a smaller shirt, this one has a LOT of fabric.  In order to achieve a good length I would cut off the sleeves and straight across the shoulders instead of straight under the armpits

Saturday, May 28, 2011

the recycled t-shirt dress

So, one day I am shopping at Wal-mart and a woman says to me, "look at you with all your little ducks in a row," and I became obsessed with the idea of making little duck shirts for my babies.  I made the duckling shirts for myself for mother's day and that Saturday I thought, "I have nothing to wear for mother's day", and thus this dress was born.  I used a yellow t-shirt of mine that was too short (why is it after having babies 86% of your shirts become too short?) and a white t-shirt that I stole from my hubby.

Step #1 was to measure myself around where I wanted the white part to start (30") then I measured from that point to about how long I wanted the dress (23")

Step #2 I divided the first number in half and that gave me the measurement for my first rectangle, 15"X23"  and that is my back piece

Step #3 Now because I am trying to hide the fact I have had 3 babies and I HATE doing sit ups I added 3inches to the first number for my second rectangle so 18"X23"

Step #4 with right sides together sew your rectangles along the 23" seam

Step #5 now you have a long tube that will be your skirt, at this point I did a gathering stitch right in the middle of my front piece about 3 inches long and played with the gathers until the skirt fit and the belly was hidden

Step #6 I tried on the yellow shirt and marked where I wanted the skirt to start  and continued that line all the way around my torso.  I pinned my white tube to the top all the way along that line.  Now I had a vision of the raw edge of the knit being visible in the dress so I just sewed the skirt right onto the top, it did not look as awesome as I thought it would so when you connect the two you might want to sew them with the right sides of the fabric together.  Now your dress can be done, but mine wasn't it was lacking a little something.  I grabbed some of the extra t-shirt fabric from Izzy's dress and I made a little belt.

There are probably a million tutorials out there on how to make a belt, here is how I made mine...

Step #1 how long do you want your belt to be?  Add 2inches.  How thick do you want your belt to be? Double that and then add 1/4inch.

Step #2 cut your fabric according to the numbers you got above, now you have one loooong rectangle.

Step #3 fold your fabric in half, hot dog style, and iron (if you have a right side to your fabric make sure it is on the inside of your fold).

Step #4 sew the strip together to give yourself one long tube

Step #5 pin a safety pin to one end of the tube and begin to feed it back into itself turning your tube right side out, and turning your seam in.  Iron your tube flat and so that the seam goes down the middle.

Step #6 fold the raw ends of the tube inward and sew closed.

Step #7 try your belt on and decide how you want to close it, you can make your belt close any way you wish.  Here I added a button/button hole, you could also use Velcro, or snaps, even just tie it, its your belt do what you want!

TADA!  The t-shirt dress, not super original I am positive you could find better instructions out there somewhere.  This is just me, and how I made my first dress for myself using what I had on hand.

Now this little cutie...

is also wearing a dress made from one of Daddy's t-shirts for mother's day (see the little duck ;)) To make this dress I used a tutorial on MADE (I am pretty much in L.O.V.E. with her blog).  I did mess up a bit though, for some reason when I gathered the front of the dress, I didn't realize I should do the same to the back part of the dress.  So the yoke is too big and there is not enough fabric for a proper tie.  Unfortunately I also finished this dress that Saturday night so when I put it on Sunday morning we just had to roll with it.
I used freezer paper to stencil the duck on this little dress and also on her brother's t-shirts.
Trying to get a pic of anybody was like trying to jump over the moon!
There you have it, my crazy mother's day dress making extravaganza!

Tuesday, May 17, 2011

sewing

Lately I have been "binge sewing" (as J calls it).  I can't help myself, I have all these ideas in my head and they are clamoring to get out, along with the things that I "have" to make like a sunbonnet for Iz and sweet baby clothes for my BFF's new baby girl.  I have been posting pics on FB and people seem to like what I am putting out, but my secret is that all the things I am making have been inspired by the much more talented bloggers on the Internet and I feel like I have to share the creative L.O.V.E.  So with my hubby's blessing I am going to begin blogging about my crafting love and hopefully share some wonderful information and inspiration for you along the way.  I will always give credit where credit is due, so if you are a crafty type please do the same.  Use these posts as a jumping off point to create something unique and your own, then you can share your creations with me!  If you are not the crafty type and you would be interested in having me make something couture for you, please leave me a comment and let me know. 

Since Izzy's birthday was this week I think I will start with her precious birthday outfit.
If you read my blog via my link on FB you are probably sick to death of this little number, but I am obsessed with it.  I used coordinating Moda fabrics that I purchased from a local shop in my small town, but I think you can find them anywhere. I made the skirt using this tutorial on MADE, which is also the same tutorial I used to make my Easter skirt
I will post more on this later

The cupcake shirt, not super original, I didn't base this design off of anything I recall seeing but check out its similarity to the birthday outfit my MIL sent...
(she popped this sweet thing in the mail the very day I posted the pics of the outfit I made, crazy right?)
I think its safe to assume the idea was floating around in my head from lots of other places. 
I found the tutorial for the precious hat online, and I also made one for a baby boy we know who's birthday is the week before Izzy's.


I also used some of the left over material to make him a bib, I just traced a bib we had for the pattern and used a washcloth to back it.  Since this little one is a bit of a drooler, I knew his mama would appreciate some extra absorbency:)

And there you have it, a birthday outfit or gift perfect for any baby :)


I also made these little mommy shorts, not too long, not too short.  I will post on them later too :)

Tuesday, February 1, 2011

Snowy Days and Cute Kids

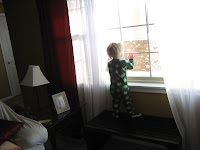
So what is new... Well today is a snow storm here in good old Altus so we are all of course still in our pajamas!  Asher is walking around in his frog footie pajamas and snow boots (on the wrong feet of course) and he told me while looking out the window that the snow was "bootiful."  Asher is also starting to play pretend with "guys" and cars (his current fav is the firetruck) and he also loves to pretend to eat your face (he may have gotten that from me).  I also love that he turns most single syllable words into two syllable words like "yeeeaa" or "thaayaat."


When the boys pretend together they always want to play the villain, and always like to pretend to be frozen.  "mommy I frozen" and they strike a pose only to be freed if I tickle them silly!  I love that they are playing together more and more these days.  The other day when I took them to school, DJ found Harley's leash in the car and when we got out he informed me that he was the puppy and Asher was the boy and Asher was going to walk him to school.  SO, Asher walked DJ into the school on a leash like a puppy dog, there are some battles I just choose not to fight and some memories I will cherish for a lifetime.  Here is a video of the evil villain laugh (professor bug is from a backyardagains episode)


DJ got a big boy bunk bed that he calls a stuck together bed, now he is sleeping on the top.  We let him pick out his own sheets, "How to Train Your Dragon" sheets, and I am in the process of making comforters (and by process I mean the material is sitting in a box by the front door).  Asher is jealous beyond words of the "stuck together bed" so we are going to brave getting Asher a mattress for the bottom bunk and move him out of his crib, dum dum dummmmmm.


Iz is still the stinkin cutest thing on this (or any other) planet.  She just absolutely lights this family up with her shy sideways glances and big belly giggles. She is really starting to move with a steady army crawl that she is slowly perfecting into a real crawl, when that happens I will have to post a video, until then here she is in her most favorite toy, the jumperoo!! 


Here are the boys new super hero boots! Yea, snow here we come!! (when it is warmer than 8 degrees out side and the wind isn't blowing at 100mph)


Also, we put the kids in a bath all together for the first time last night, there is a picture of that, but I think we will save it for immediate family and future prom dates.


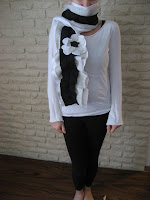
Finally I have been a sewing mad woman full of inspiration from all of these awesome blogs... I made this scarf (and soon to be matching earwarmers) for my mom...
I made this scarf to go with the "bracelet" that didn't turn out from the last post

And I made this shirt up-cycled from a shirt that doesn't fit J anymore...
Love to you all, stay warm!

Thursday, January 27, 2011

Things That Mama Made


SO, since my fast from FB I found a new obsession, crafting blogs!  These women are amazing!!!  The things that they create, and then they tell you how to do it!  I was posting things that I made on my Etsy shop FB page, but that was getting confusing.  So now I just think I will share my new creations on here with you all and hopefully you can be inspired to create a few things yourself :) 

This is a cuff bracelet that I made using the tutorial on this site http://littlemissmomma.blogspot.com/2010/10/victorian-lace-and-ruffles-cuff.html, and this was my second attempt however, because in my first attempt I used felt for the fabric (she says stiff fabric, but felt made me feel like I was about to brave a snow storm not wearing a fun piece of jewelry) 


This is the felt fabric first attempt.  I still thought it was so pretty and I had to find something to do with it.  So I put 2 broach pins on the back and pinned it to my sweater.


Not bad, but its a little long.  I think I might try to find a shirt to pin it on military style?  Who knows!?  That is the fun of it!!!

The Backpacks are finally done (I have only been planning on making them since August).  I made them out of J's old flight suits and J is ordering some patches with the boys names on them so they can look more legit.  They turned out pretty well.  There are definitely things I think I would change if I did them again, but that will NOT be any time soon :)


And finally this is a onsie I made for the IZ.  Why is she not wearing it you ask?  Because Sunday she wore it to church and before I could take a pic of her in it she had a huge blow out diaper.  Today it was clean but I didn't really have the heart to put her in it and make her pose for pictures since she has a bit of a cold and was a pretty pathetic little girl all afternoon.

So here is a picture of a happy Izzy B and some leg warmers I made for my Etsy shop.  We had a photo shoot with a professional photographer of all of my Etsy goodies, so that I can start taking myself a little more seriously.  Thank you so much to all of you who have taken me seriously already! 
More blogs on the babies to come soon...